LevelViz 003 : Adding a plan view and a custom editor
2016-04-26 5:36 PM
For the next major feature of LevelViz I wanted to add the ability to seamless transition into a plan view so people could see a topdown view of the scene (as well as possibly side and front views). This is very similar tohow you see a orthographic projection of the top, front and side views of a scene in most 3d authoring packages. The idea is to essentially be able to generate nice drawings of the scene with little to nowork required from the scene author.
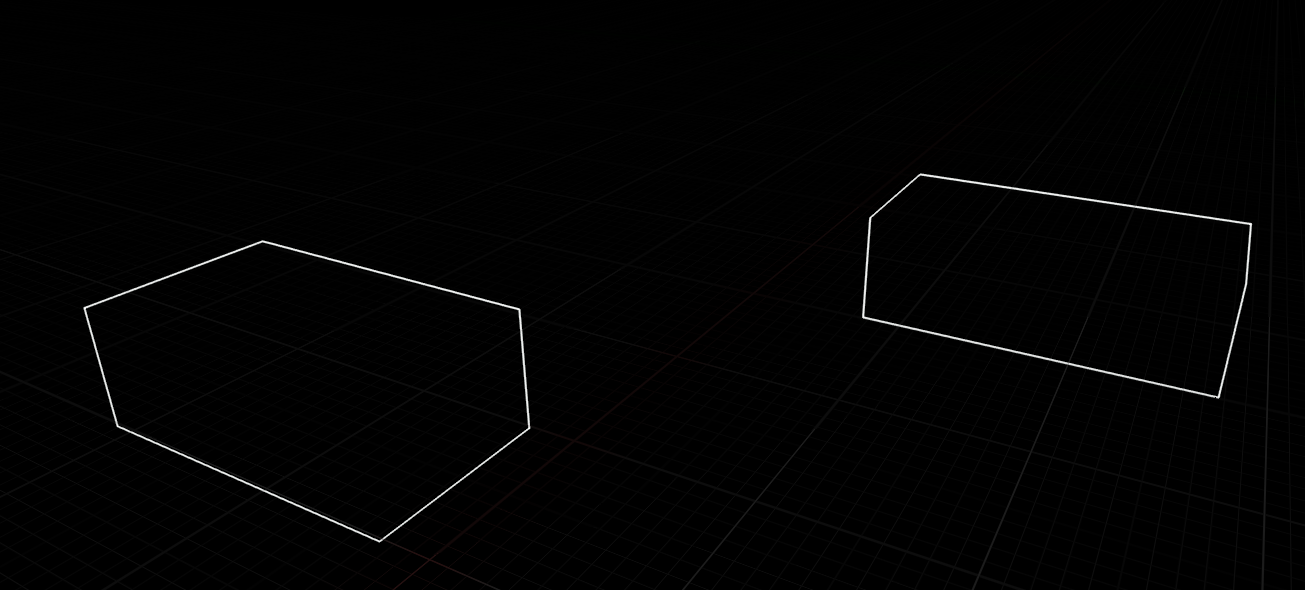
Here is a preview of what the functionality looks like right now :
To accomplish this I had to do a few things. First I needed to get a decent looking outline effect. Second I needed to create a small editor for selecting the geometry that will contribute to the plan view. Finally I needed a way to figure out how to manipulate the camera so that it can seamless transition into a nice framing of the plan view. I’ll cover each of these 3 major steps over the course of this development log post.
Essentially what I want is clean lines around the bounds of a static mesh for each mesh we choose to be part of the plan view.
I considered a few options on how to get the look for the plan view. At first I considered rendering as a wireframe but the issue with the default method of rendering as a wireframe is that by the point the mesh is processed on the GPU it has become triangulated which is not something desirable for this type of drawing. Here’s what it looks like :

One way I could have possibly fixed this is by not rendering an edge who’s two attached faces are co-planar. It’s possible this could have worked but I was worried about issues with non-desirable edges who adjacent faces were slightly non-co-planar rendering by accident. I could somewhat reduce this issue by introducing a co-planarity thresholdbut I started to worry about other edge cases I haven’t anticipated plus while considering this method I came upon another method that accomplishes the same effect but with less room for edge case errors.
What I did was render all the objects of interest to a depth buffer then used edge detection to give them a render outline. I used a well known edge detection technique which luckily has ample documentation on how to implement using the unreal engine and their material system. Here’s what it looks like :
Next I wanted to be able to select various static meshes to be flagged as meshes which contribute to the drawing of the plan view.
The core of this plugin relies on placing a “ViewManager” actor into a scene. The view manager does a lot of management of various objects relevant to the plugin such as tracking vantage points as well as storing the array of meshes which will contribute to the plan view. Now I could have just exposed the plan view mesh array so I can add them one by one with the eye dropper but that is tedious. I wanted a way to select a group of meshes and add them to the plan view. The problem here is that if I select a bunch of meshes then I’m no longer selecting the view manager and as such I can’t add them to the view manager array.

To solve this what I decided I needed to do was make a small floating window which persists even when the view manager is not selected. This was a good opportunity for me to start digging deep into what it takes to augment the editor further than simple details customization. I studied up on Michael Noland’s essential “Extending the Editor” youtube video which is by far my favorite training video Epic has produced because rather than going every detail to the point of being tedious he shows the major ways you can extend the editor then points the audience to various types and keywords we can look up in the engine source code to see how stuff is done. One of the great things about a video like this is it’s very resistant to obsolescence when new versions of the Unreal engine are released. Implementation details change frequently but the overall concepts are the same.
You can view the video here :https://www.youtube.com/watch?v=zg_VstBxDi8
After studying how an editor is implemented and doing some small experiments adding my own commands I concluded that my use case doesn’t justify a new full blown editor but rather just a new window. You launch the window from the view managers details panel and it persists until you close it. Here’s how you would launch it (the view manager is selected in this image).
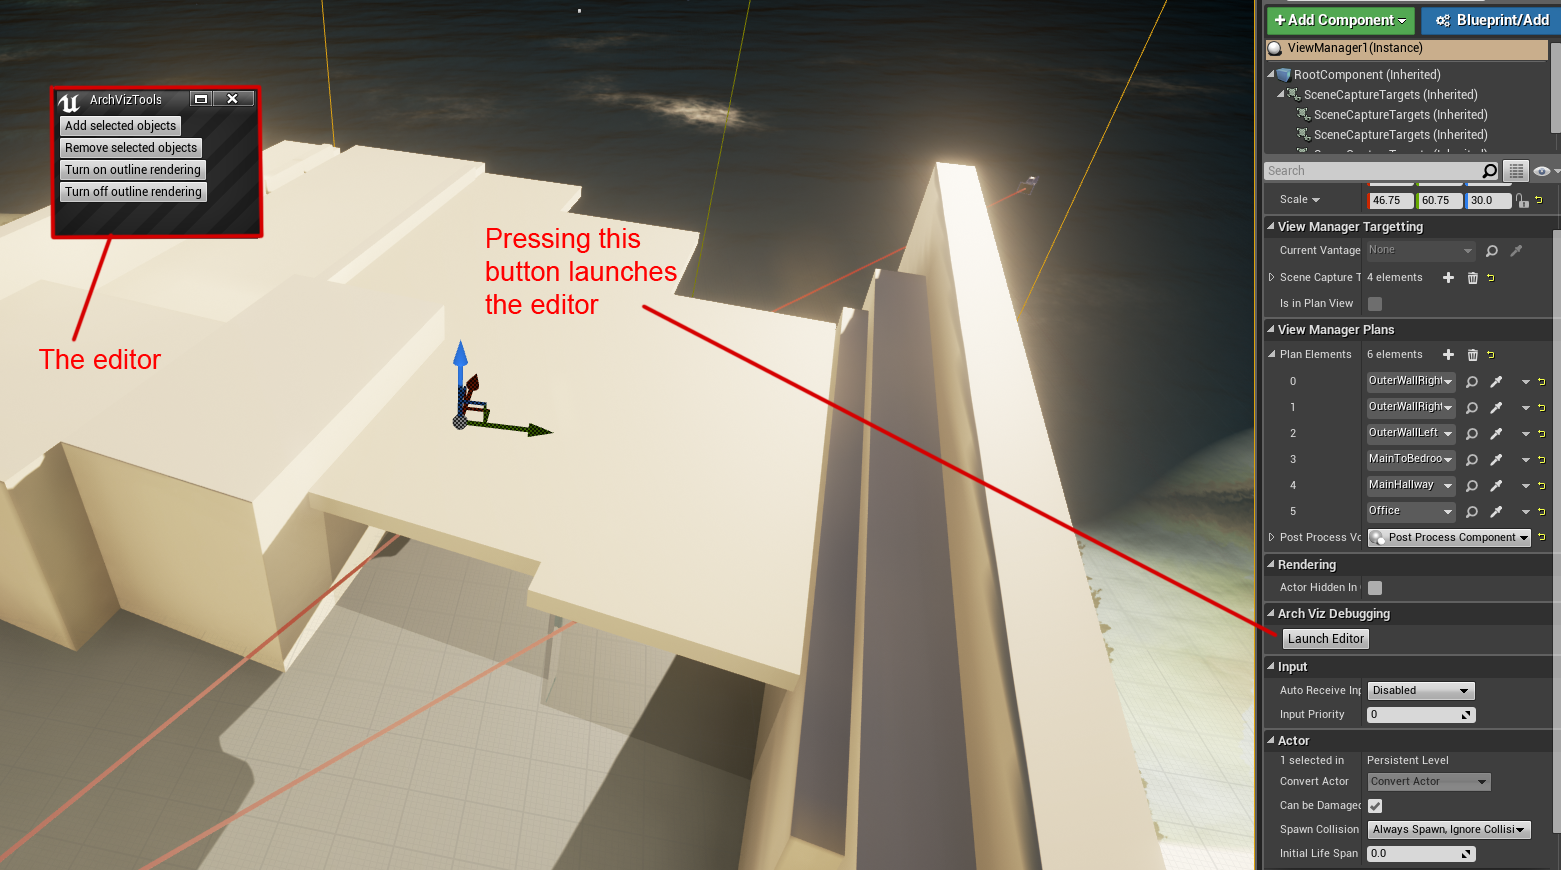
Setting this up is fairly easy. First I have to setup a new button for launching the editor. This is fairly straightforward, I do a details customization on the view manager where I add the button.
void FViewManagerDetailsCustomization::CustomizeDetails(IDetailLayoutBuilder& DetailBuilder)
{
ObjectsBeingCustomized.Empty();
DetailBuilder.GetObjectsBeingCustomized(/*out*/ ObjectsBeingCustomized);
IDetailCategoryBuilder& ViewManagerCategory = DetailBuilder.EditCategory("Arch Viz Debugging", FText::GetEmpty());
ViewManagerCategory.SetCategoryVisibility(true);

{
ViewManagerCategory.AddCustomRow(LOCTEXT("Plan View", "Plan View"))
.WholeRowContent()
[
SNew(SHorizontalBox)
+ SHorizontalBox::Slot()
.AutoWidth()
.Padding(2.0f, 0.0f)
.VAlign(VAlign_Center)
.HAlign(HAlign_Left)
[
SNew(SButton)
.Text(LOCTEXT("Launch Editor", "Launch Editor"))
.ToolTipText(LOCTEXT("LaunchEditor_ToolTip", "Launches the ViewManager standalone editor."))
.OnClicked(this, &FViewManagerDetailsCustomization::LaunchViewManagerEditor)
]
];
}
}
From here when the button is clicked in the callback I request a reference to my editor module which has a data member that is the type of my editor and from there I launch the editor. This is how I launch the editor.
static FName ArchVizEditorModuleName("ArchVizViewerEditor");
FArchVizViewerEditorModule& ArchVizEditorModule = FModuleManager::GetModuleChecked<FArchVizViewerEditorModule>(ArchVizEditorModuleName);
ArchVizEditorModule.ViewManagerEditor.LaunchViewManagerEditor();
As an aside I found some really interesting/weird behavior. I can actually remove the view manager editor data member from my module and directly load it like this :
static FName ArchVizEditorModuleName("ArchVizViewerEditor");
FViewManagerEditor& ArchVizEditorModule = FModuleManager::GetModuleChecked<FViewManagerEditor>(ArchVizEditorModuleName);
ArchVizEditorModule.LaunchViewManagerEditor();
This is weird for a number of reasons. First it doesn’t implement IModuleInterface which I had suspected was required. Second it somehow creates an instance of FViewManagerEditor which I would have thought might have involved calling the default constructor. As a test I made the default ctor private and made a specialized ctor and it STILL managed to create a valid instance of this class. I did some light digging through the source code for the module manager singleton and couldn’t find any template magic that was somehow able to create a valid instance of my editor without a default ctor.
There is one issue however. The editor will crash on exit trying to find a module. I suspect that while this works, it’s a side effect and is not intended to be used that way and is probably dying on module de-initialization. Requesting my actual module with the editor as a data member avoids the crash.
Anyways from here I simply add 4 buttons for all the actions I wish to perform. When a button performs an action that requires a reference to the view manager I do a heavy query of all the objects in the editors world for the view manager then cache that reference. With my view manager reference available to my editor, adding and removing objects from the plan view is easy. It’s merely a matter of getting an array of all selected static mesh objects and adding them to the view managers array of plan meshes.
Setting up the transitionNext I wanted to be able to do a nice transition to plan view from any arbitrary vantage point. There’s a few challenges to this.
First is the camera projection. The camera is using a perspective projection matrix which is not ideal for a top-down plan view. This would cause the plans to look like they are jumping out at you rather than look like a top down drawing. This requires switching the camera to use an orthographic projection matrix. This is very easy to do in Unreal, in fact it’s a matter of setting a single boolean as well as setting up the typical values that go into setting up an orthographic projection matrix such as defining the width and height of the projection volume. What Unreal doesn’t provide is a way to smoothly lerp from perspective to orthographic projection matrices. This will be something I’ll be tackling in the near future.
Next is generating a transform for the camera position to look down on the scene. To do this I added a post-process component to the view manager which the user can setup to define the region for the plan view. I need the post-process component for the outline rendering so this essentially kills two birds with one stone.This way I make the transform conform to the rotation of the post-process volume as well as use it to derive the parameters for setting up the orthographic projection matrix.
One thing I still need to do is add an editor-only arrow component so people can know which direction is up on the plan when it’s generated.
Here’s what the volume looks like in the editor.

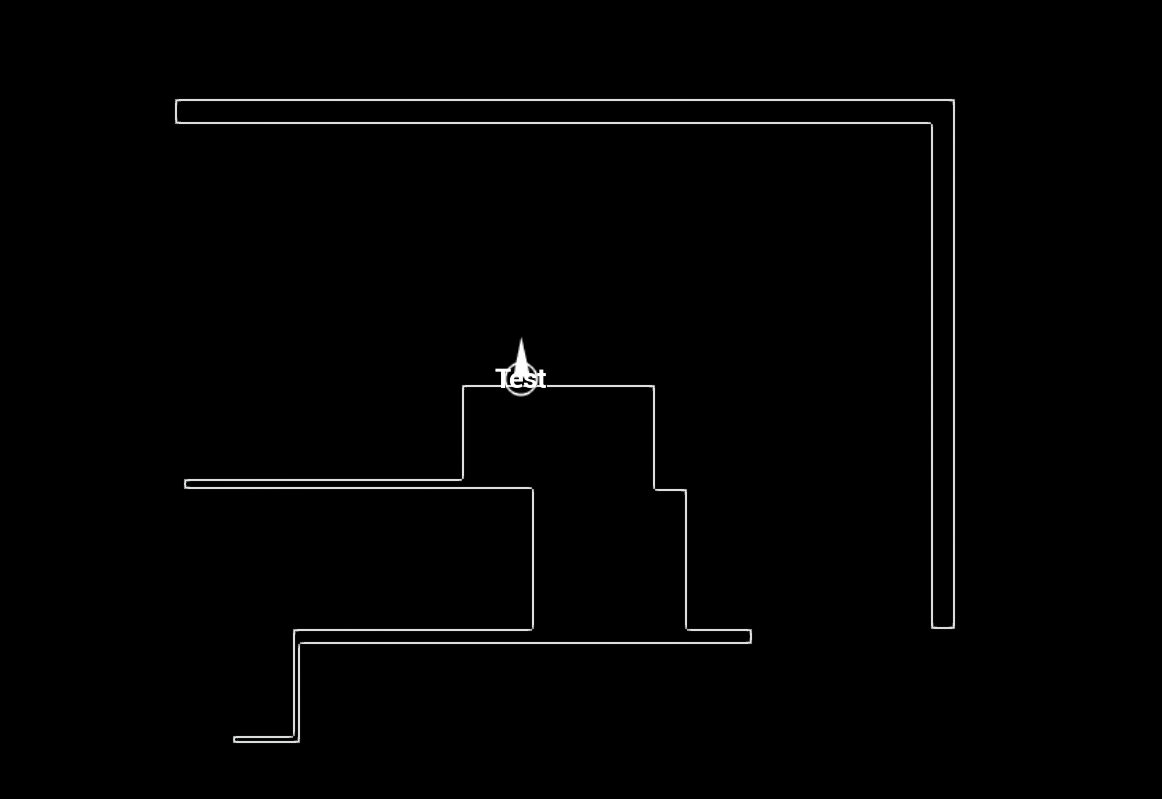
And here is the topdown plan view generated from this volume when viewing ingame (sorry about the little test icon in there, that’s something I’m currently working on that’s unfinished).
If the view is a little confusing here is a roughly aligned view in the editor of what the plan view is displaying.

If this blog post was a little much to take in I apologize. These development blogs I treat like a stream of consciousness and make a point to try to keep the time to write them under an hour so I can actually focus on development